As part of our mapping tutorial, we've put together this Crash Course on Open Orienteering Mapper, the main software we're using.

CTRL-N) ① Double-Click on Load symbol set from a file… ③, Click the file you just downloaded ④, and Click the Open button ⑤.So far, so good. We’ve now got a blank area for drawing the map, and a palette full of cool symbols (toggle the Symbol Window on or off with CTRL-Shift-8).
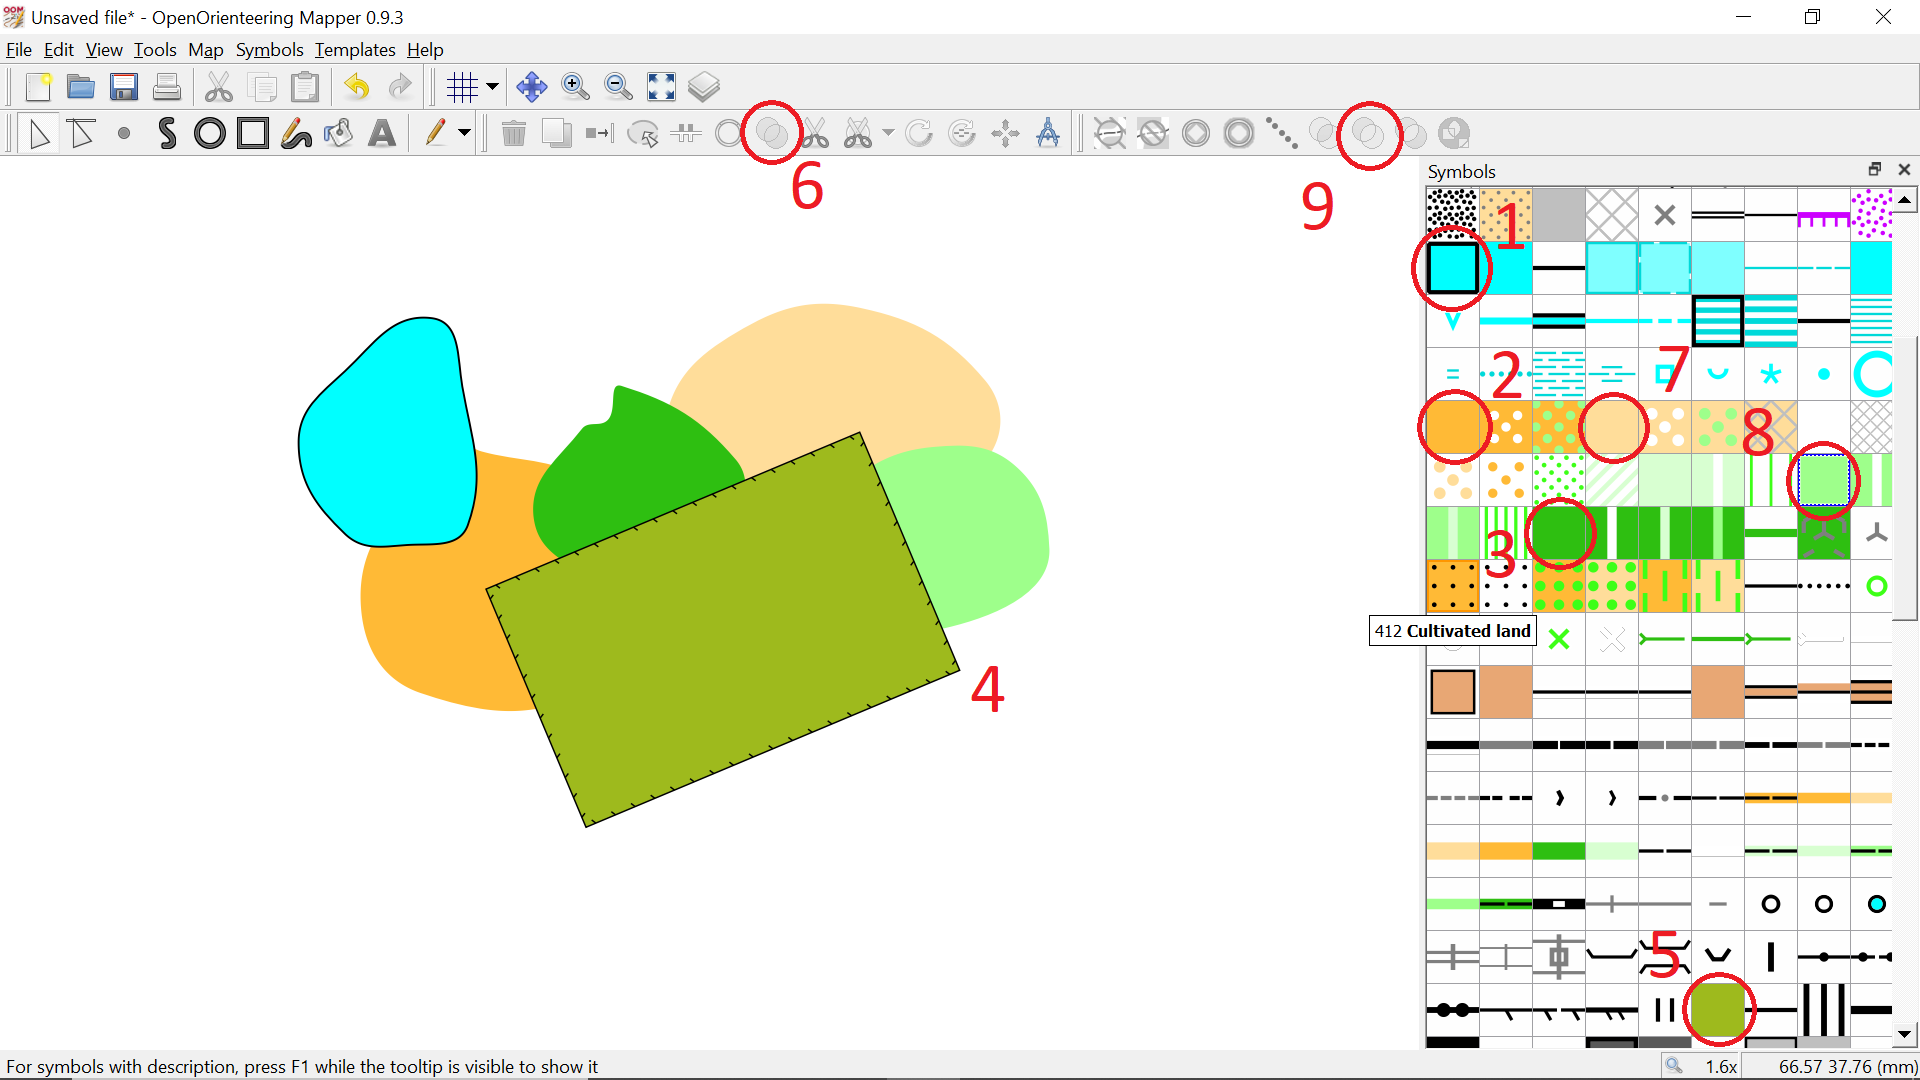
Click on the tile for symbol Click on itClick somewhere on the map-drawing area ③ to place an instance of the feature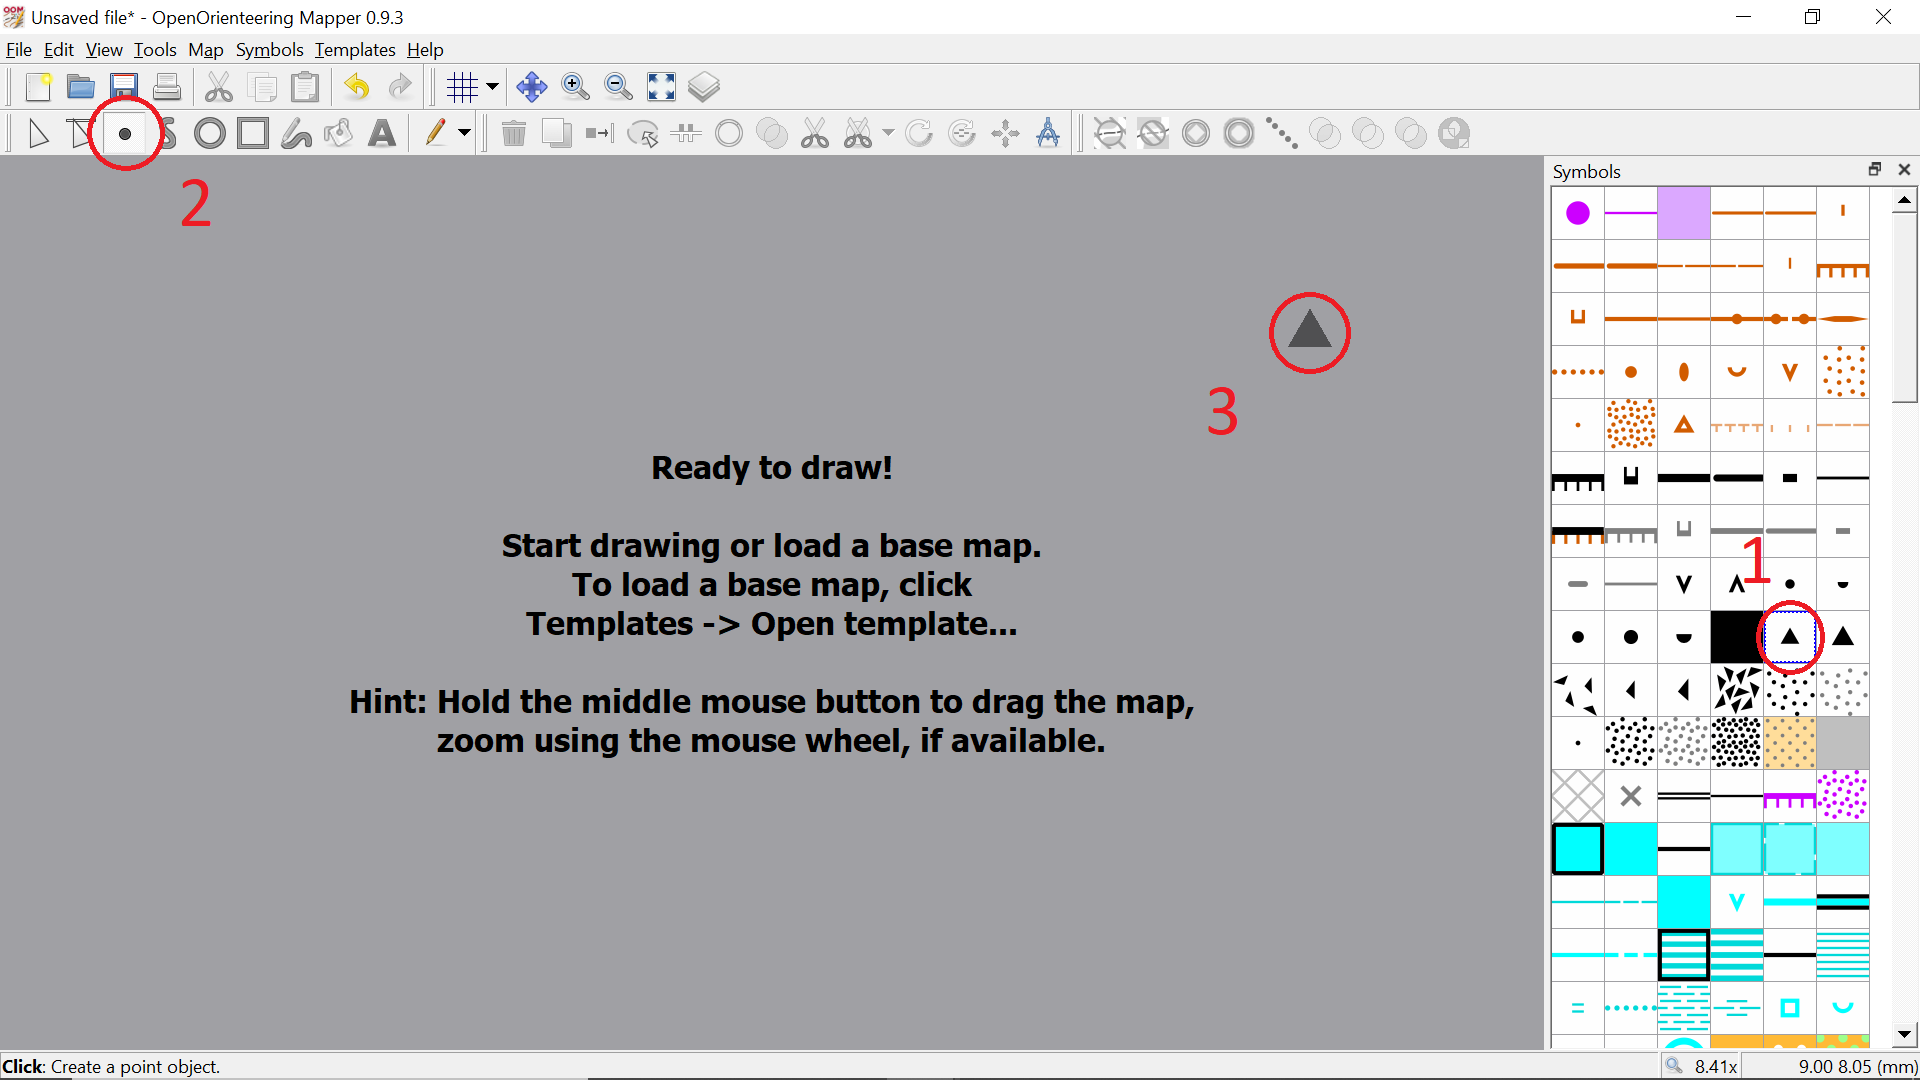
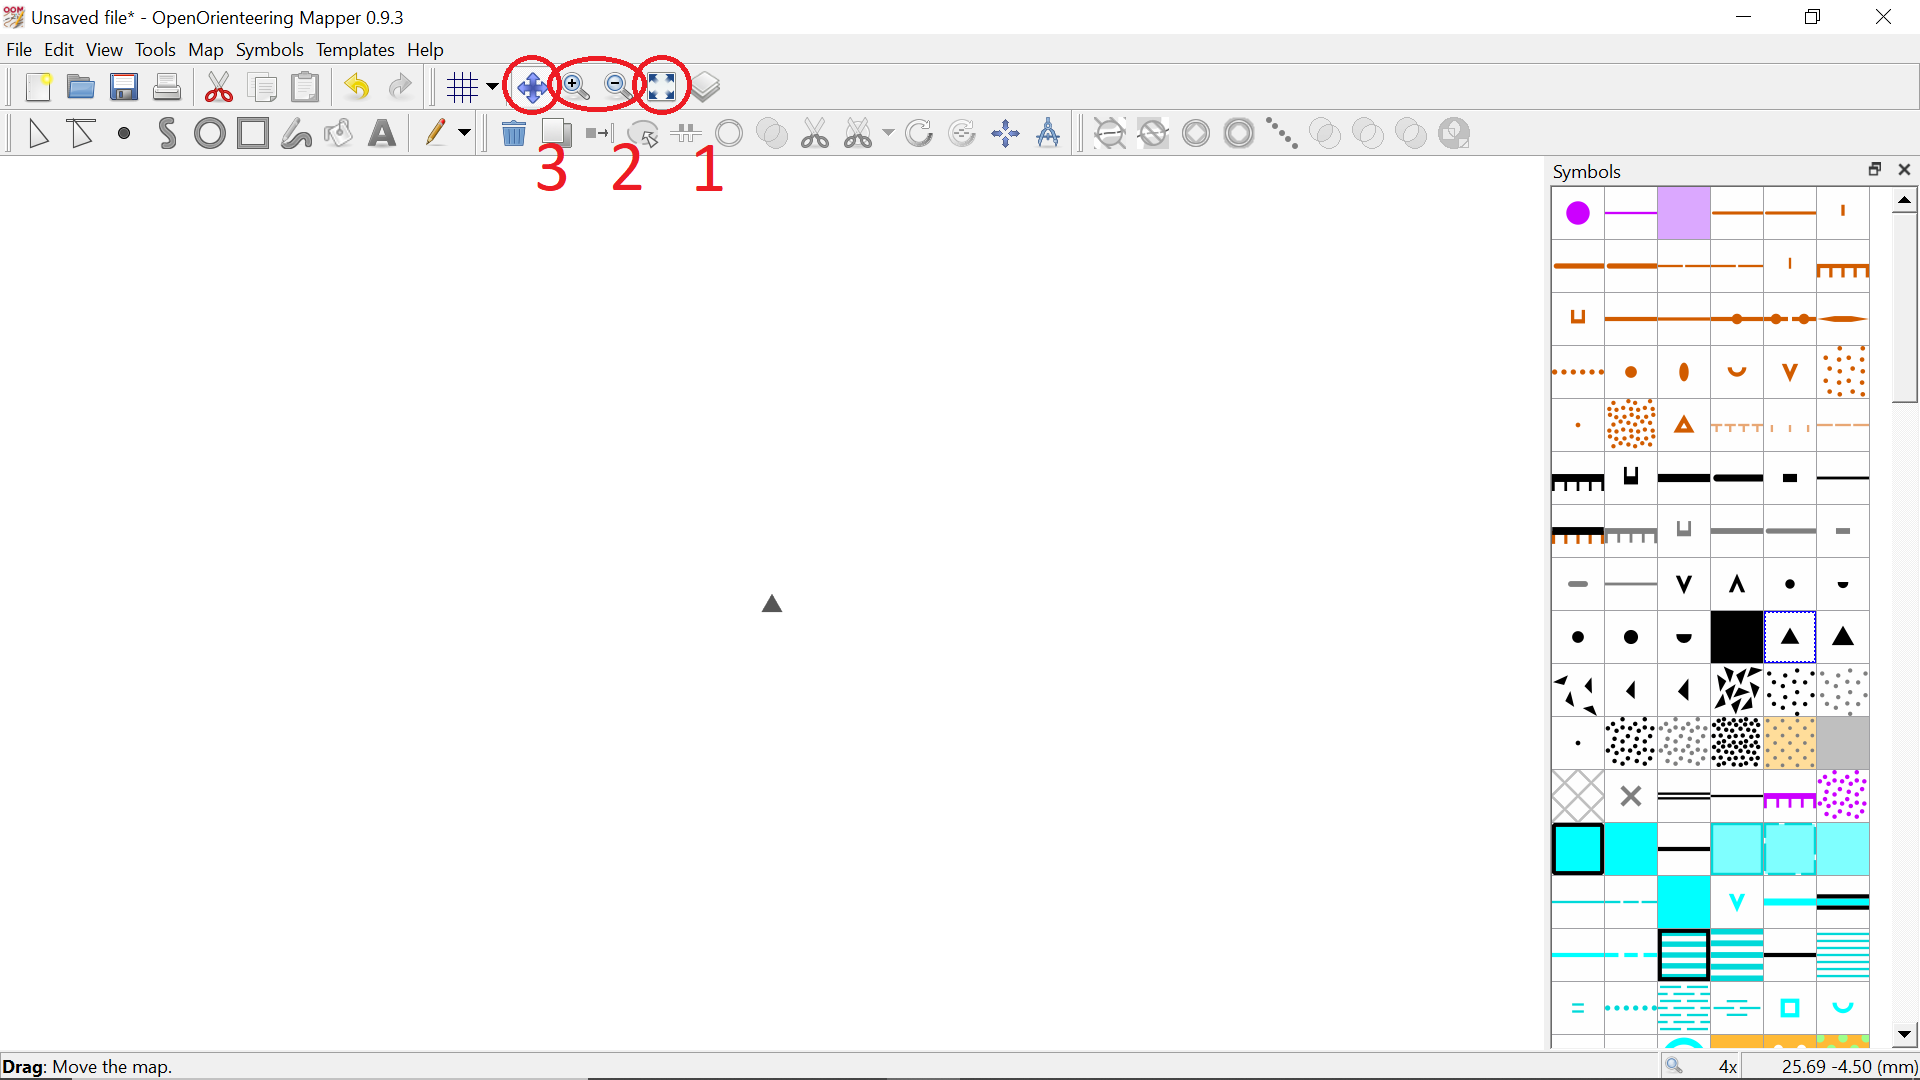
Click on the Click on the + or - keys) until you are happy with the zoom level (alternatively, you can set the zoom level numerically from the menus)Drag the map around—you're not repositioning any objects here, just changing what part of the map you're looking at← ↑ → ↓ arrow keysAs you hover over the map-drawing area, note some handy things that appear on the Status bar at the bottom of the display
Right-Click the values shown to display them in a different format—most importantly, Latitude/Longitude (Dec) (which unfortunately isn’t available for our crash course because our file lacks georeferencing, but keep this capability in mind when you are working on a real map)Click, Shift-Click, Drag, Right-Click, CTRL-Click, and so on in various situations (these options provide a lot of power and flexibility, so keep an eye on them)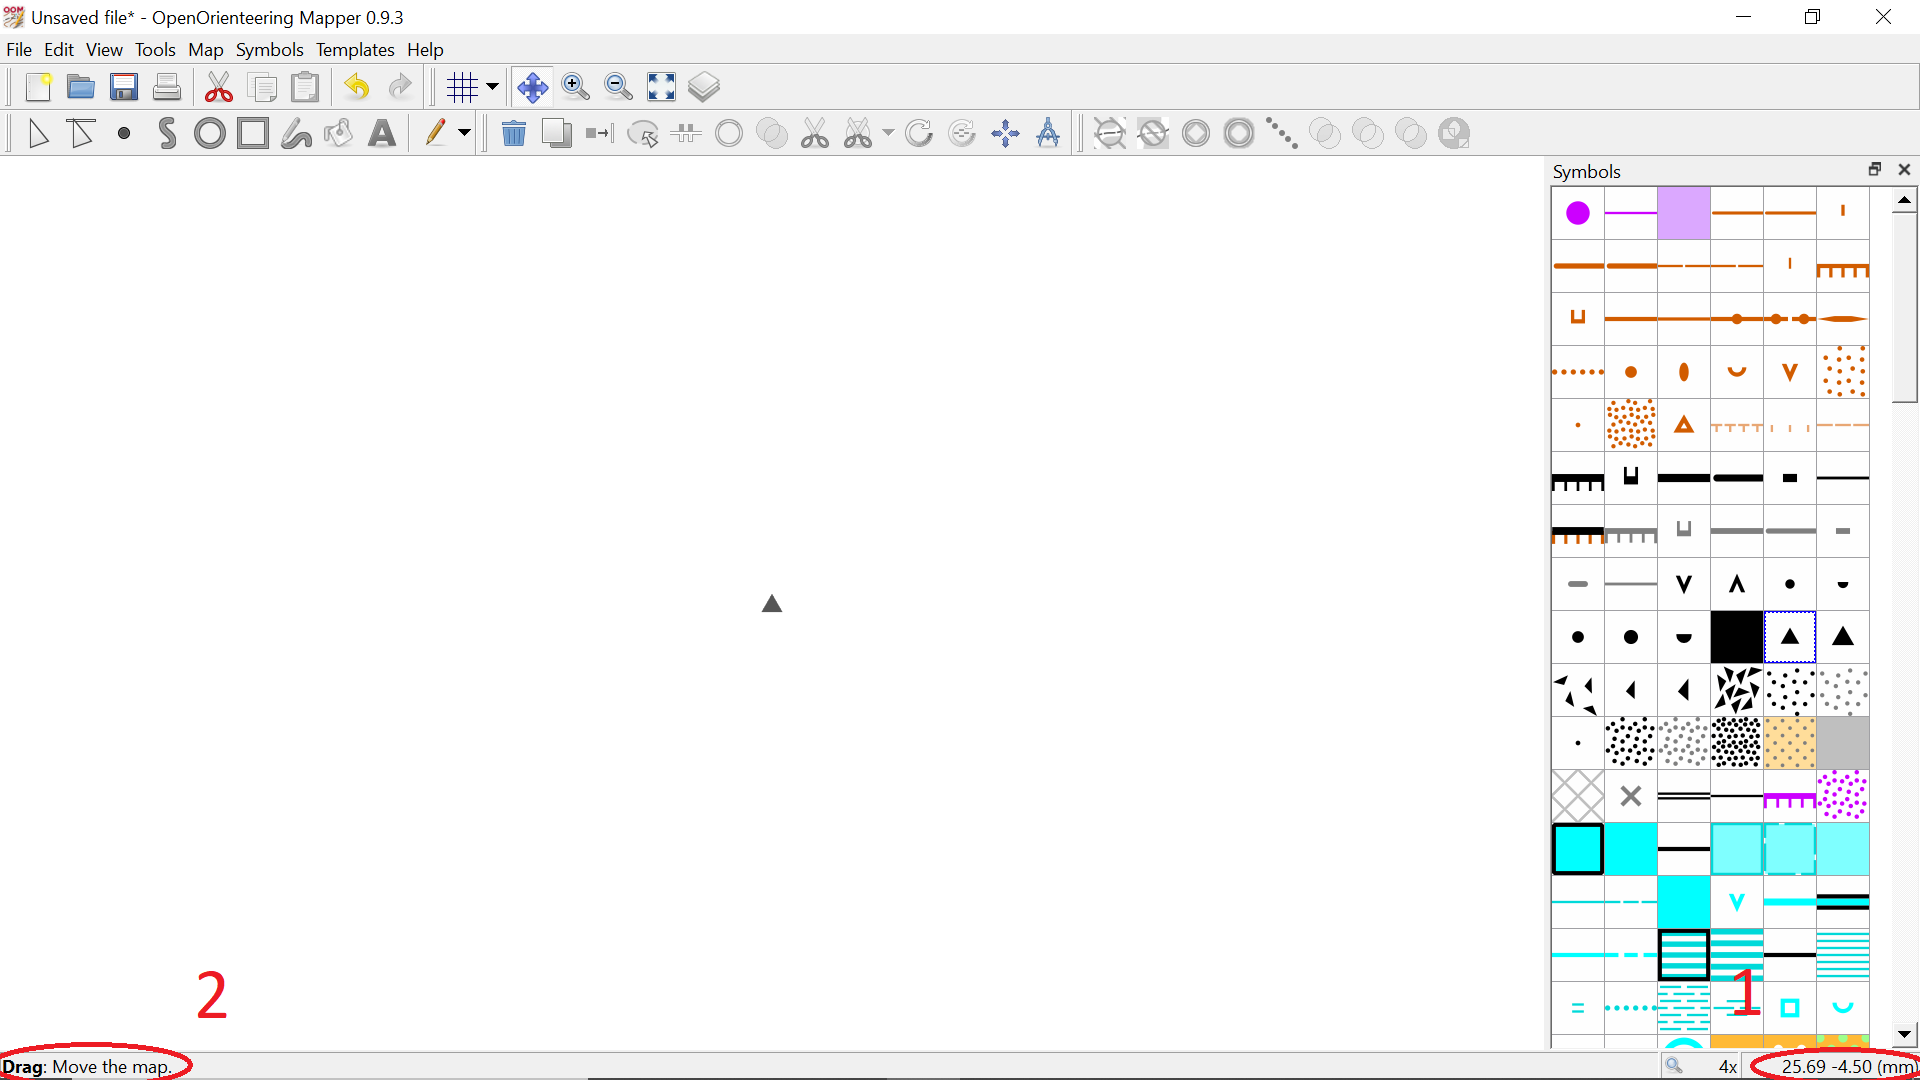
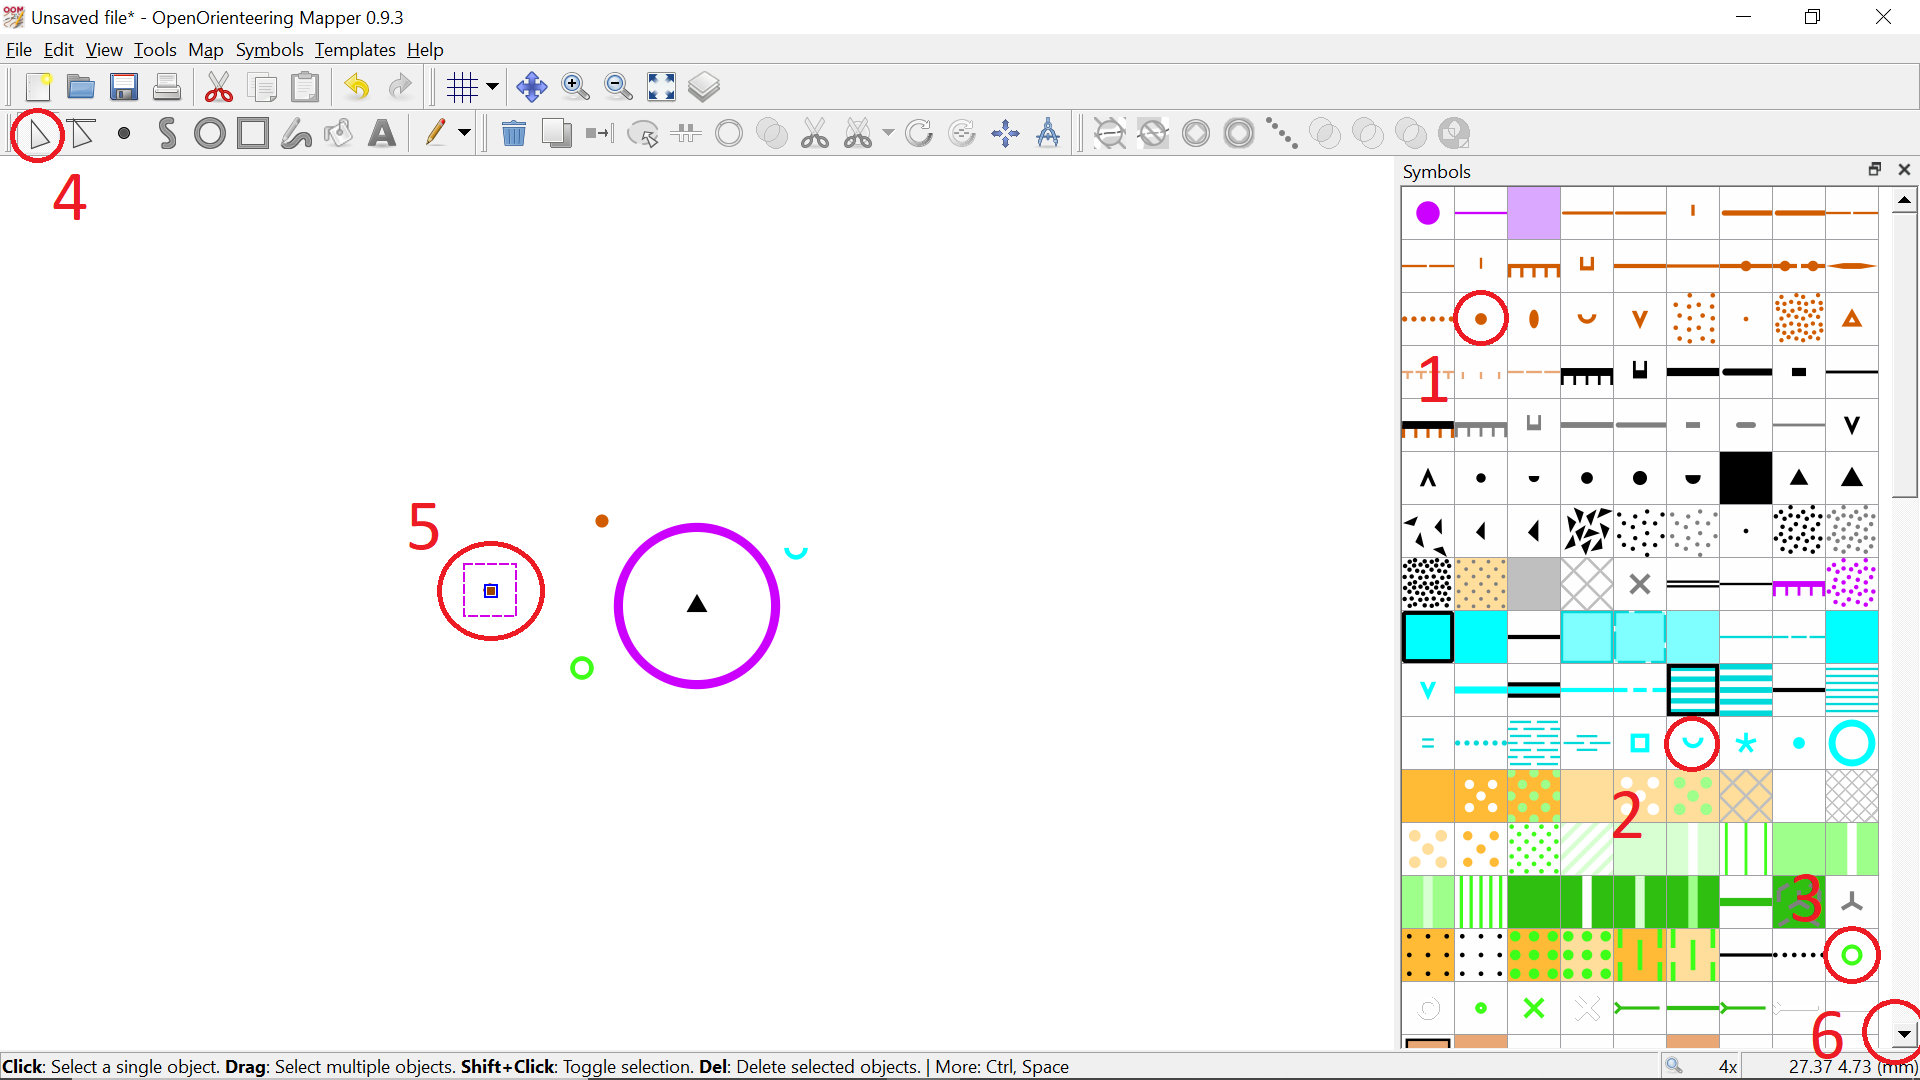
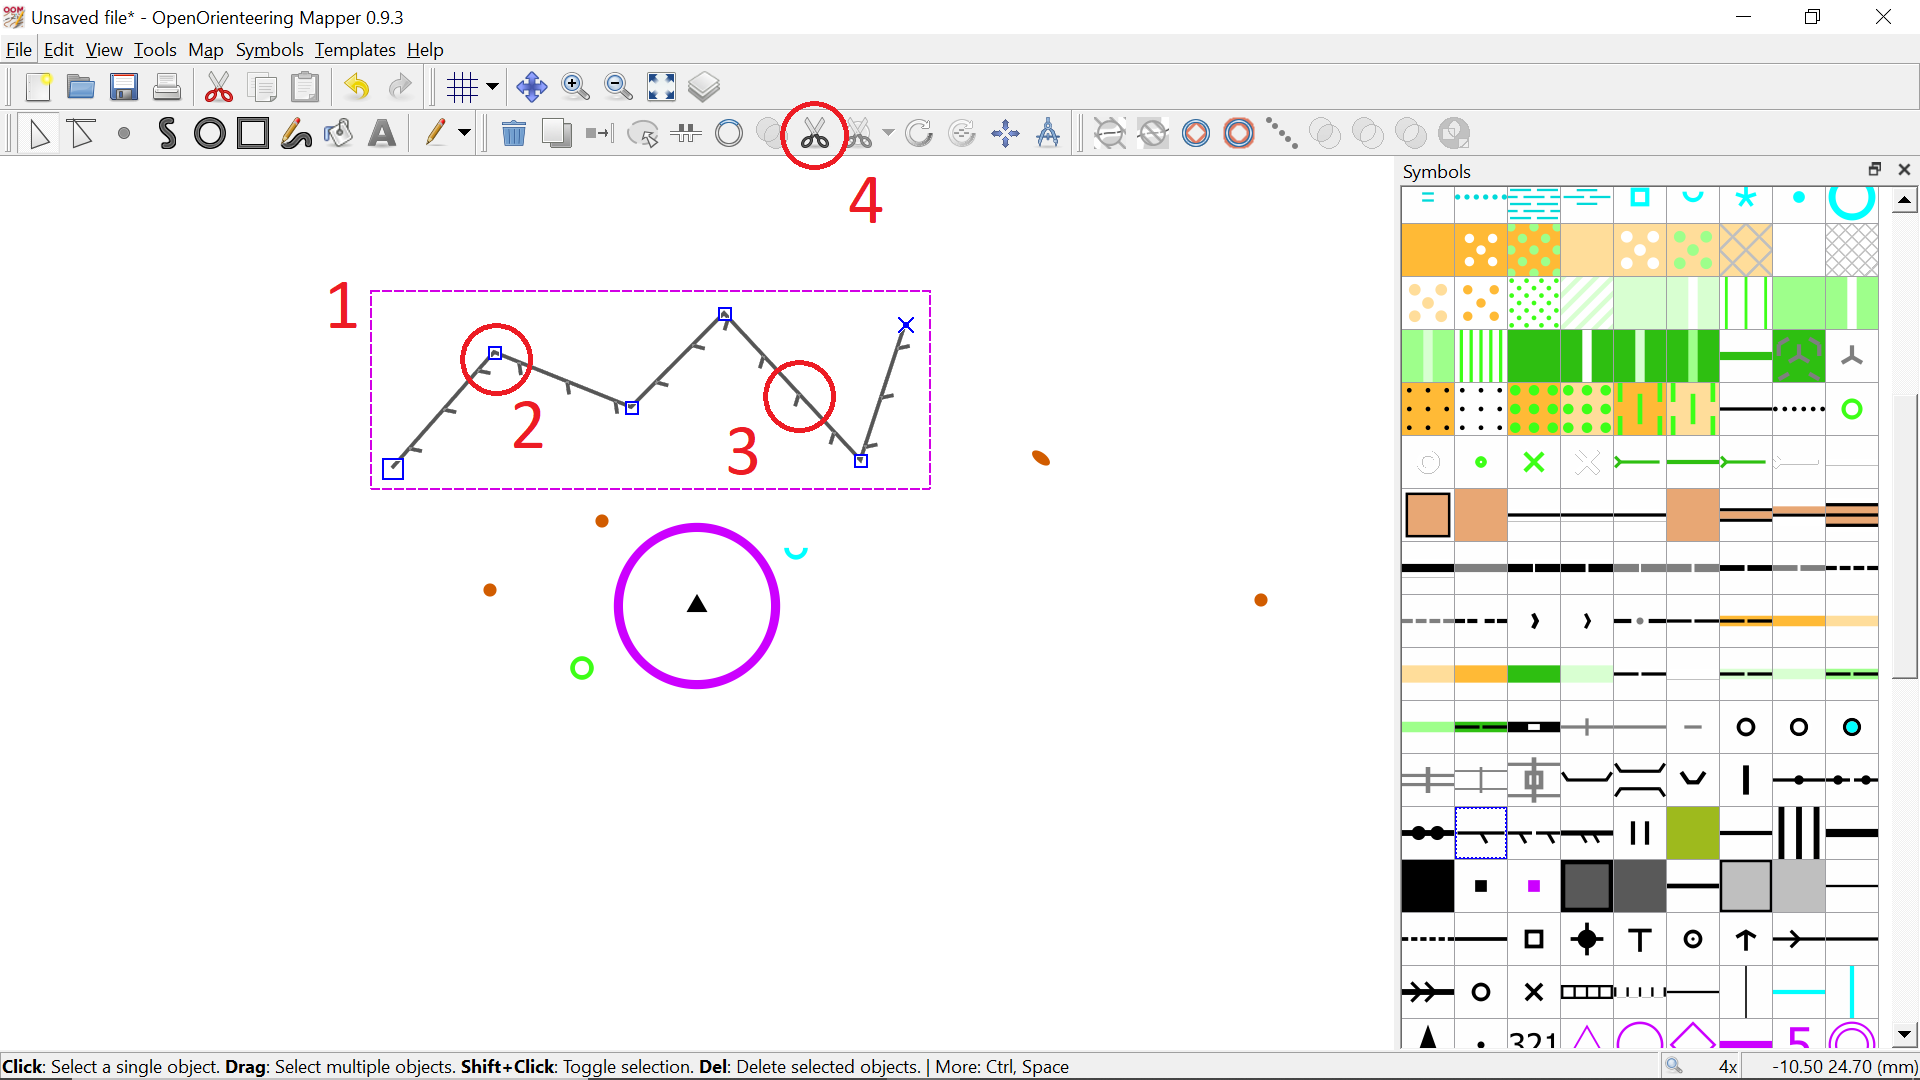
Drag its Delete keyCTRL-Zd key—since the clone is now sitting on top of an identical symbol, it’s kind of hard to tell it’s there, but it becomes more obvious if you Drag the clone somewhere elseClick on the tile for new symbol, then hit CTRL-GDrag diagonally across a rectangular region ②Shift-Click individual objects to include or disinclude them in the current selectionCTRL-A (we'll learn more about working with map parts on Day 3)Right-Click on the corresponding symbol on the symbol palette and then using the pop-up menu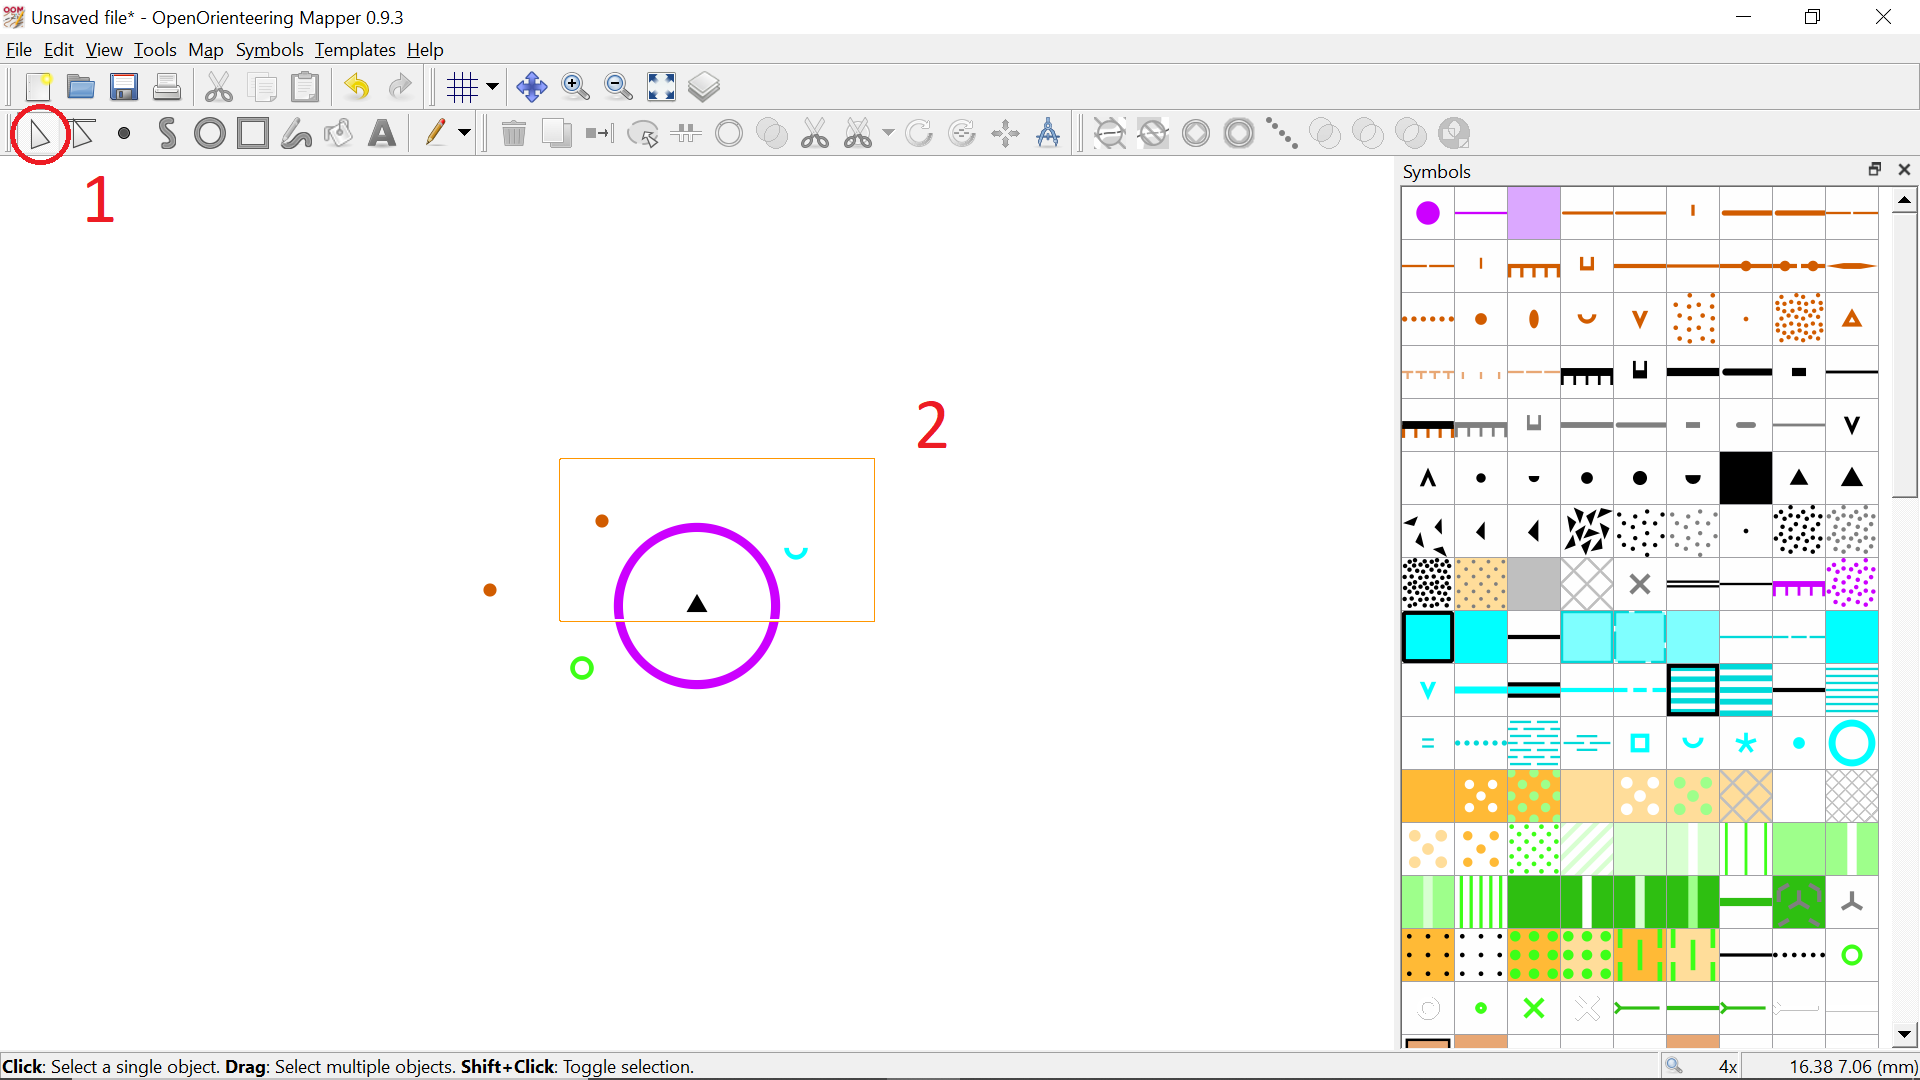
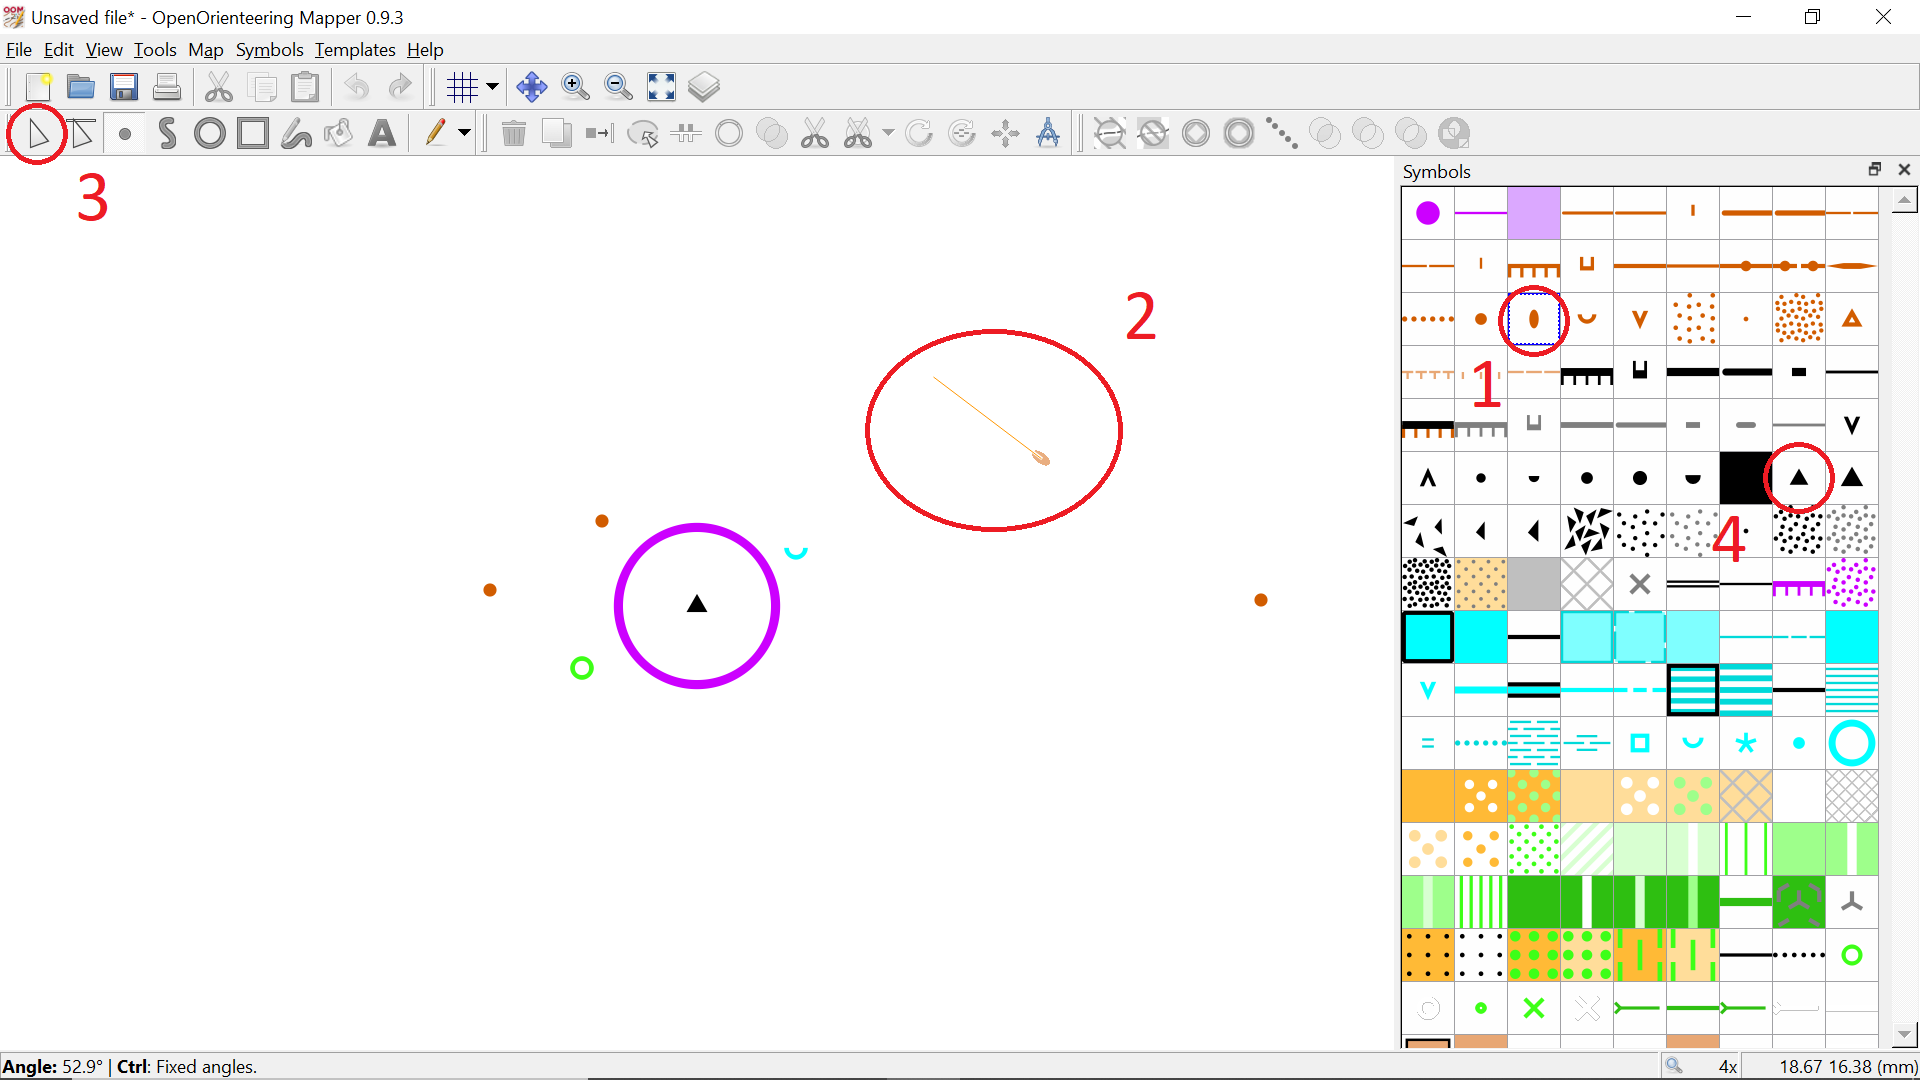
Click, Drag it in a circular motion to simultaneously set its rotation ②. Note that the numerical rotation angle is shown in the Status bar.r key to adjust the rotation of an existing, selected object—when done, Click the r key when you've got multiple objects selected (including a mixture of rotatable and non-rotatable objects)Click on the tile for Click on the Click a series of points on the map to form a zigzag path ③Double-Click to end the path—note that the Double-Click does not add an additional point to the path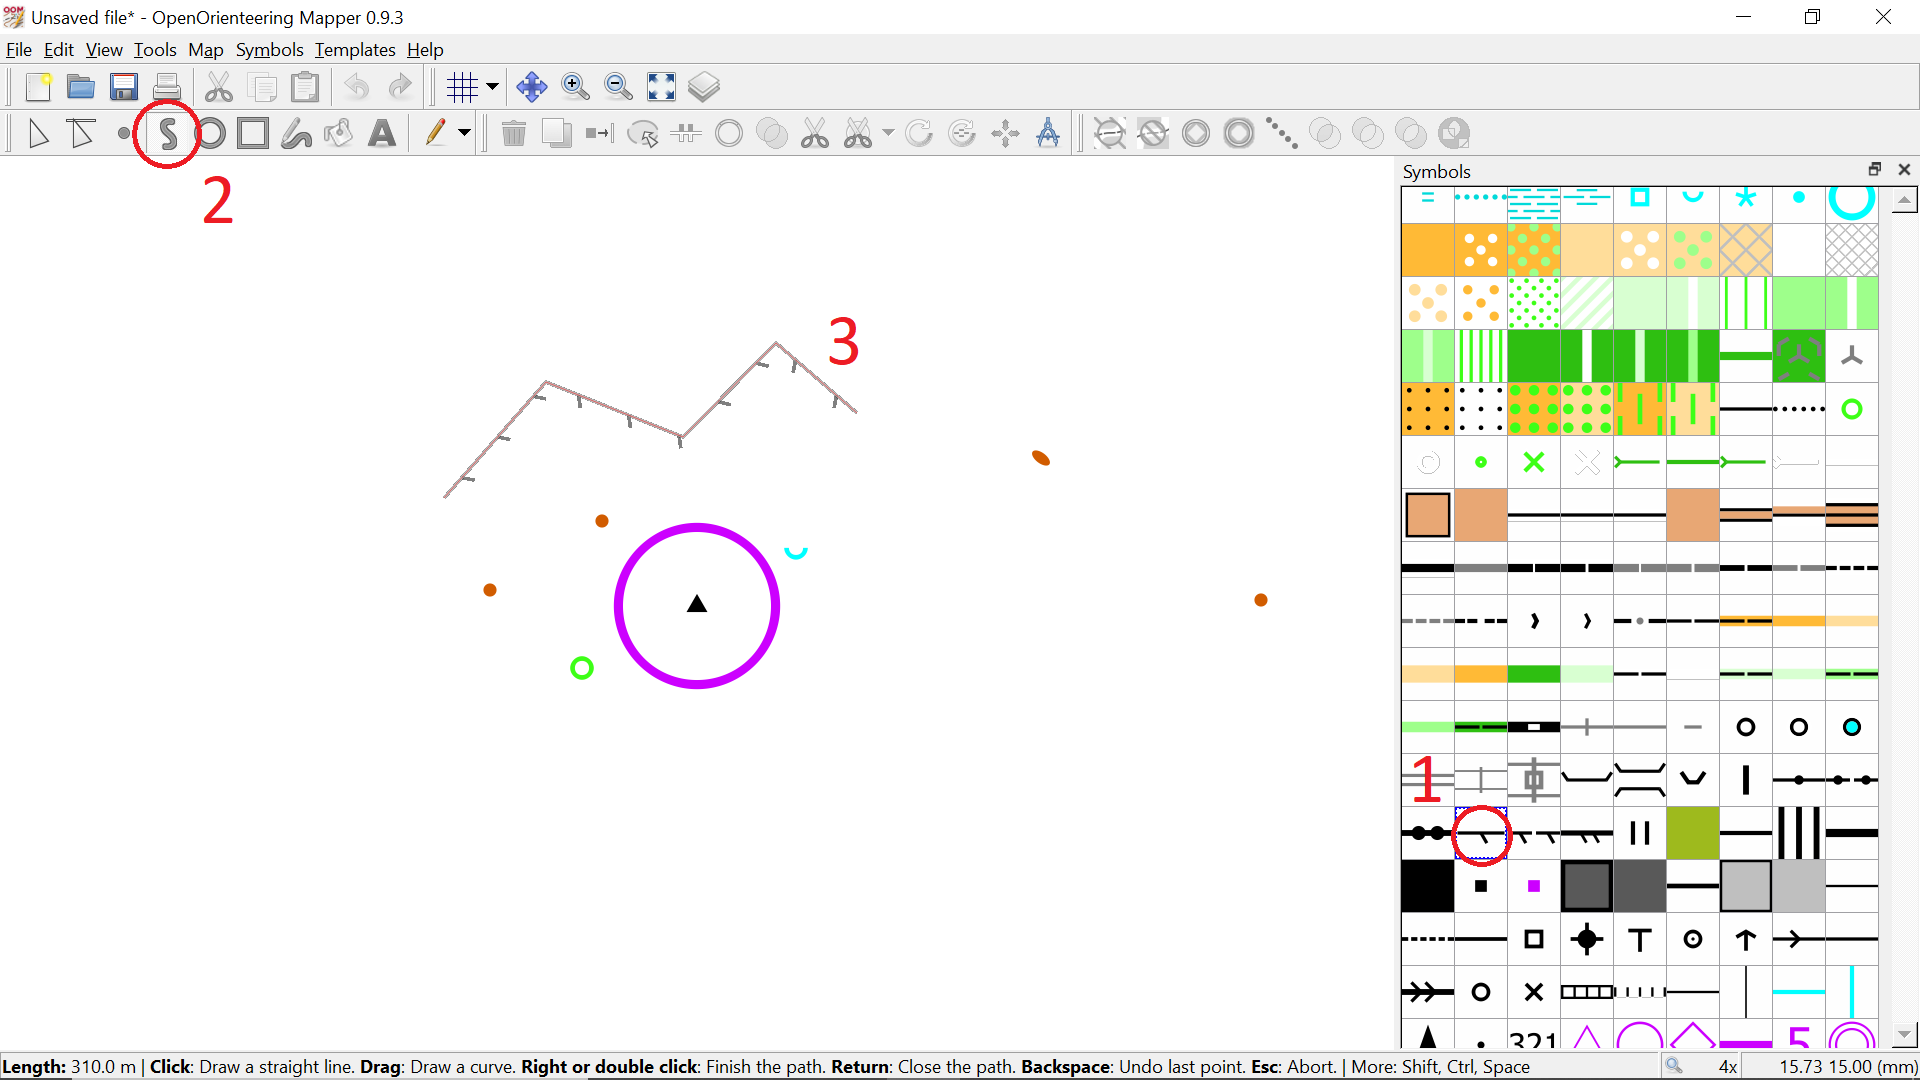
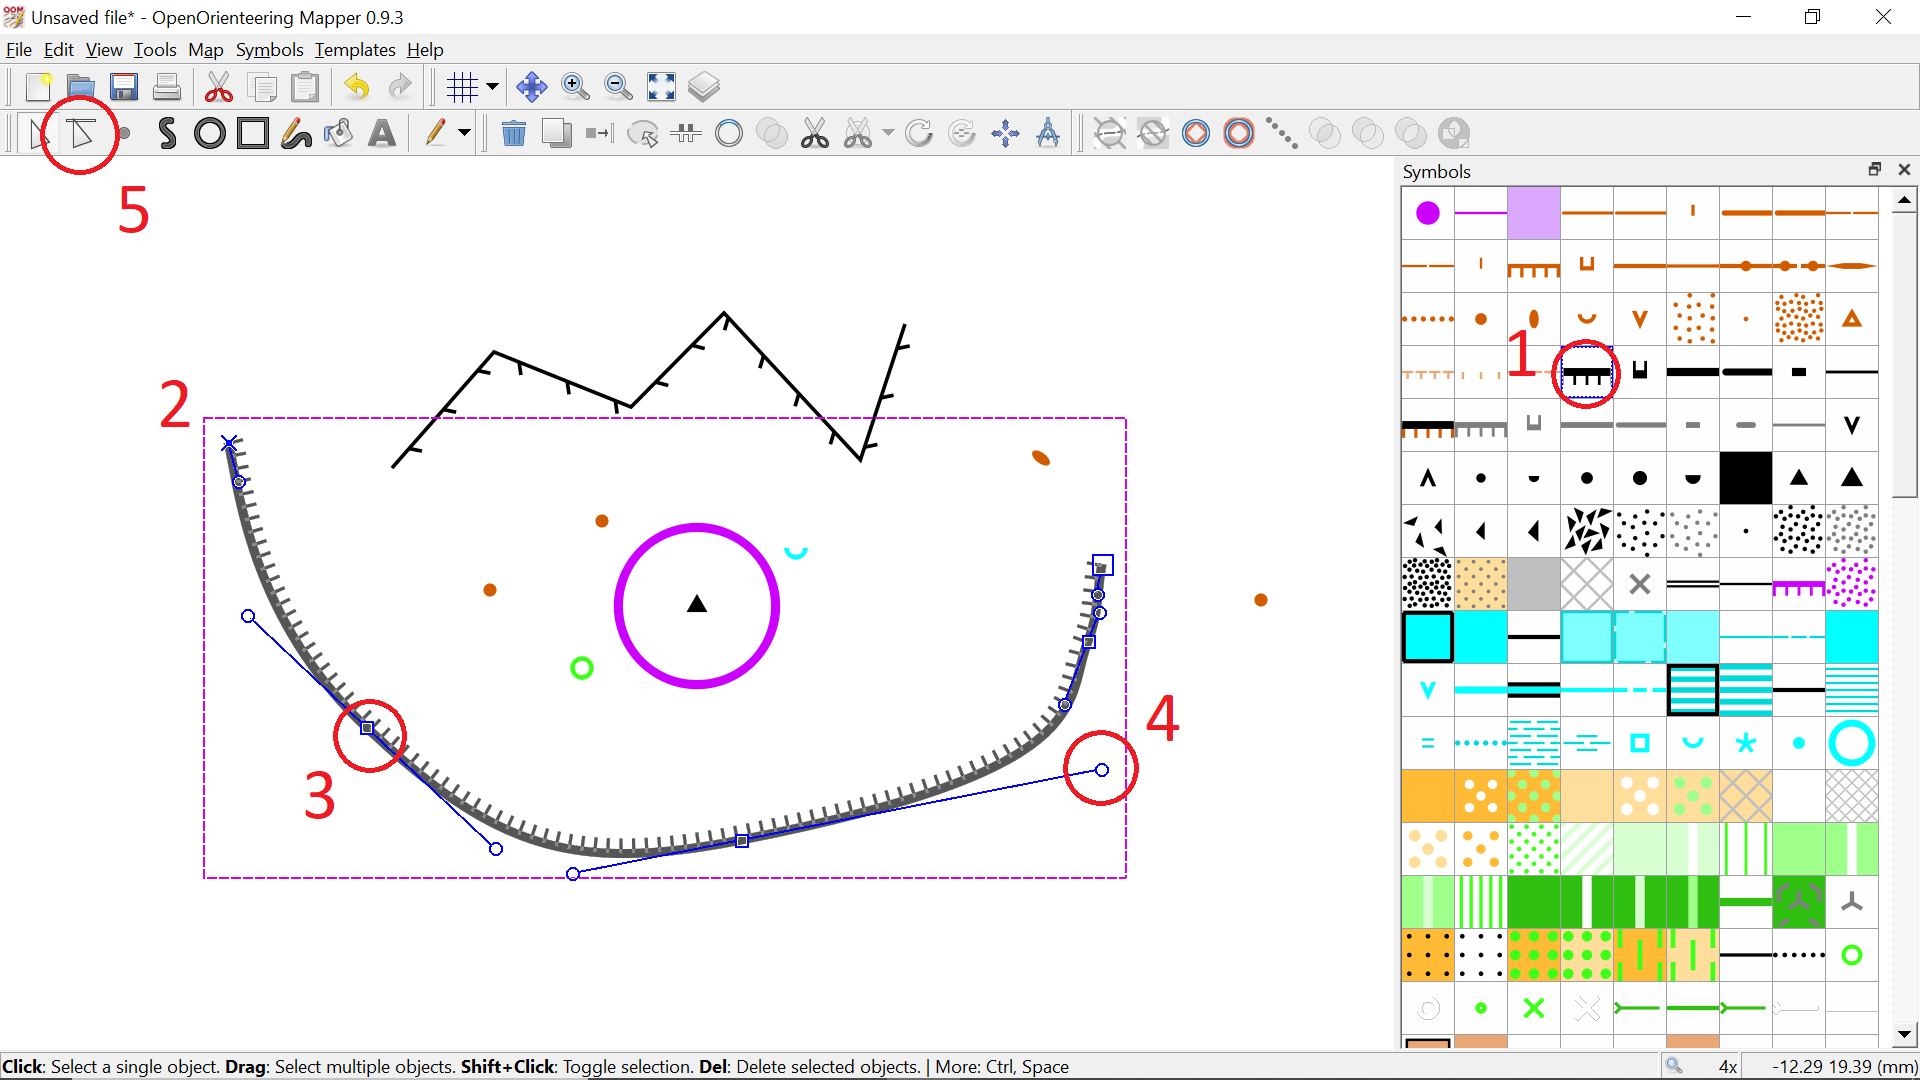
Drag the Drag one of the CTRL-Click one of the vertices to remove itCTRL-Click between two existing vertices ③ to create a new vertexCTRL-D to flip its sidednessr key to rotate itClick on it with the c key to connect themc key also works to join an object to itself (forming a closed loop or polygon)n key to convert hard angles to smooth bezier curves ②CTRL-Click on a line segment to toggle it between straight and curvedSelect a linear feature, hit the z key, Drag to scale it (enlarge or reduce), then Click the ![]() Edit objects tool to exit scaling mode.
Edit objects tool to exit scaling mode.
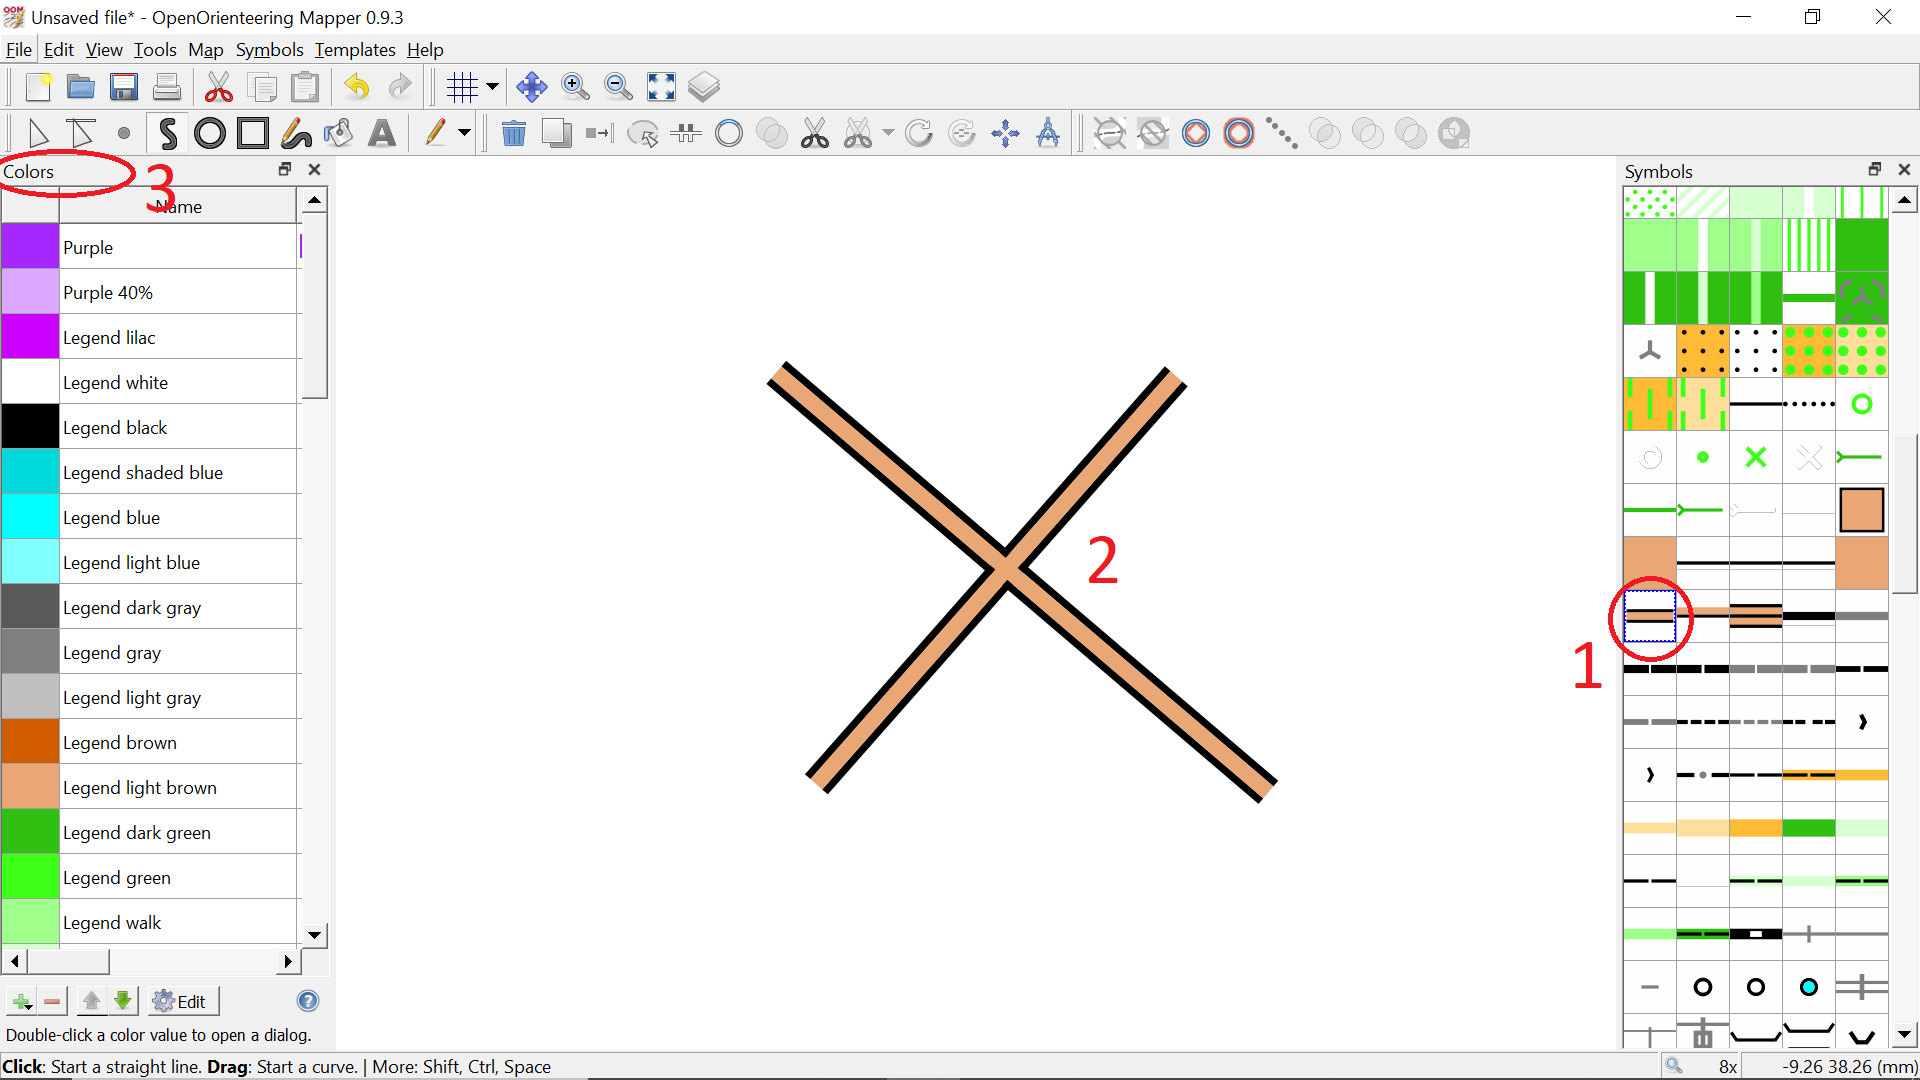
Draw two intersecting lines with ![]() 502 Wide road ① and zoom in a bit. So cool! How does the system know that the intersection ② shouldn’t have any thin black lines inside of it?
502 Wide road ① and zoom in a bit. So cool! How does the system know that the intersection ② shouldn’t have any thin black lines inside of it?
Well, it doesn’t. Those black lines are still present—they’re just not apparent. The brown infill color has a higher priority than the black border color, so the former occludes the latter wherever they both occur.
Color priority is responsible for a ton of very subtle behavior that is intended to make your life easier and provide power and flexibility when drawing. However, there are times when the way things act can be a bit confusing.
It’s sort of an advanced topic, but in those situations, you might get some insight by viewing the color priority scheme with CTRL-Shift-7 ③. Go ahead and look, but I’d recommend against changing anything. The priority scheme has many dependencies and any changes are very likely to have a number of unintended consequences.
Areas work a lot like lines. Anything you can do to a closed linear object, you can also do to an area. Practice making and manipulating some areas such as ![]() 301 Uncrossable body of water ①,
301 Uncrossable body of water ①, ![]() 401 Open land ②, and
401 Open land ②, and ![]() 410 Vegetation: fight ③.
410 Vegetation: fight ③.
You can also switch an area feature to a closed linear feature and vice versa. For example, if an area enclosed by a fence ④ is to be shown as ![]() 520 Area that shall not be entered ⑤, you can clone the fence (
520 Area that shall not be entered ⑤, you can clone the fence (d key) and then switch the clone (CTRL-G) to the out-of-bounds symbol.
Finally, there are some special operations that mainly pertain to overlapping areas. Draw two overlapping areas using the same symbol, then Click the ![]() Unify areas tool ⑥.
Unify areas tool ⑥.
Now draw two overlapping areas using two different symbols (for instance ![]() 403 Rough open land ⑦ and
403 Rough open land ⑦ and ![]() 408 Vegetation: walk ⑧). According to the color priority scheme, the green area occludes the yellow area. But what if we want to use the yellow area to eat away at (remove part of) the green area? Select the two areas in this specific order: the area that you want to chew a hole in, and then the area that you want to seem to grow by virtue of being unveiled. Then
408 Vegetation: walk ⑧). According to the color priority scheme, the green area occludes the yellow area. But what if we want to use the yellow area to eat away at (remove part of) the green area? Select the two areas in this specific order: the area that you want to chew a hole in, and then the area that you want to seem to grow by virtue of being unveiled. Then Click the ![]() Cut away from area tool ⑨.
Cut away from area tool ⑨.
That’s it for the crash course! Decide whether you want to Save your file or throw it out. For our actual project, we’ll create a new file.
Put your skills to use and start mapping!